Saturday, 23 August 2008
Mushroom House and Its Garden
Could have gone to the Watnong Chapter North American Rock Garden Society picnic last month on the day it was originally scheduled. Weather altered the timing, and the rain date didn't work for us. I e-mailed Carolyn and Bob with our regrets, because I'd really wanted to go. Ah well. What a delight, then, to receive a special invitation for just me and Paul. Come for a visit, have a light lunch, and see the garden. What could be more enjoyable! Carolyn sent the directions and besides, I have a GPS in my car. Her comment, "There's no house number, but you can't miss it." cause a quiver, but whatever. Have the directions, have the GPS, have her telephone number. What can go wrong? The appointed day and time arrived and we headed off for South Orange, New Jersey.
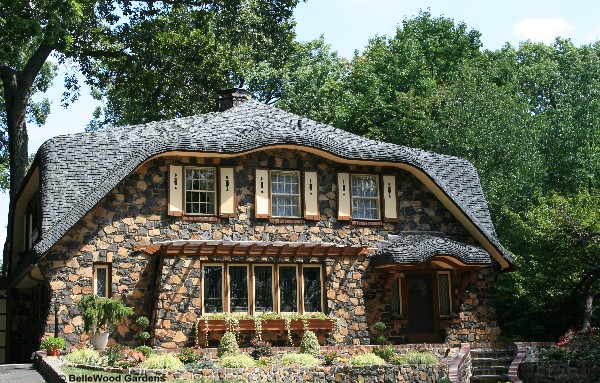
Carolyn was absolutely correct. Cannot miss the Mushroom House. Built of Watchung basalt
early in the last century, it looks as if it should be a thatched cottage in the Cotswolds.
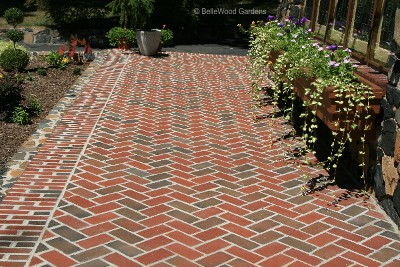
Every detail is superb. The terrace was recently relaid, in the original herringbone pattern.
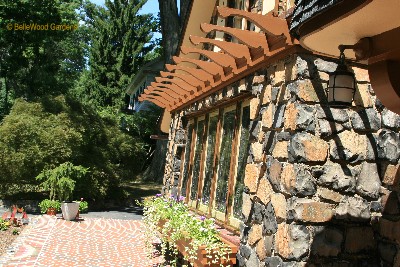
Marvelous rafter ends have a Carl Larsen appearance.
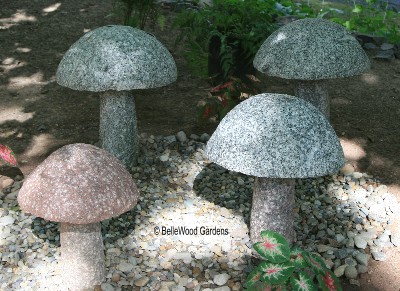
And everywhere - but not overwhelmingly so - there are mushrooms.
Beautifully crafted from stone
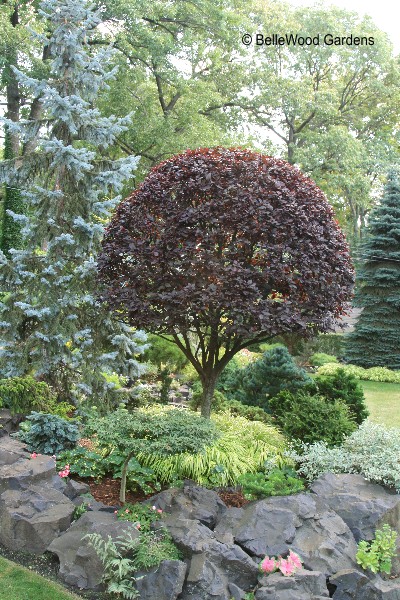
and cunningly pruned in the garden.
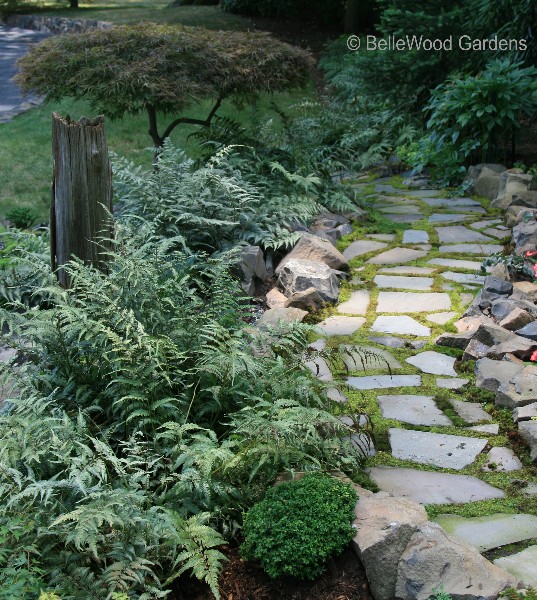
It is modest in size, gently sloped, and entirely Bob and Carolyn's creation,
from the raised beds crafted of Watchung basalt to the thoughtful selection of plants,
and artistic touches. Come, let us walk down the fern edged, moss-mortared stone path.
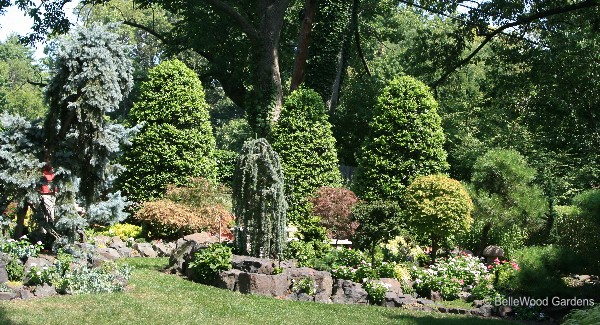
A diverse collection of conifers offer a wonderful variety of colors and shapes.
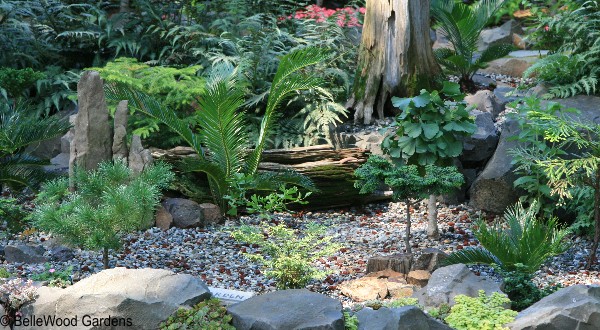
Bob's Pangaean garden. At the start of the Mesozoic Era, 248 million years ago,
Earth's continents were all jammed together in a supercontinent. The dense Watchung basalt
emerged from a volcanic upwelling. There were seed bearing plants such as conifers and ginkgos
and palm-like cycads, ferns and horsetails. And dinosaurs.

Art by Leslie Zimmer, all rights reserved.
Some of the plants survive today, and Bob has them here in his garden.
But no dinosaurs. It's not Jurassic Park.

Here, subtly placed, is an elegant statue of Buddha, meditating
as wispy grasses lay gently on his shoulder and their susurrus
speaks to him with each passing breeze.
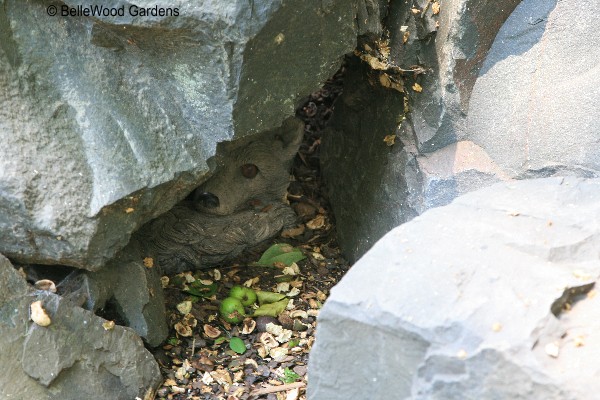
There's room for whimsy too, with la casa del zorro -
and a little fox curls up snug in his den.
And after a delectable lunch, complete with mushroom dip a la Mushroom House,
a grilled chicken salad, endless glasses of iced tea, and a luscious fruit compote
we were treated to a performance of the Aquanauts, the Mushroom House trained goldfish.
Now, I never would have thought that goldfish had much of a memory. Nor,
that they could be trained to perform. With endless patience and genuine fondness
for her 16 performing goldfish, Carolyn showed us just what these veil tailed
finny performers are capable of. They play ball, with a yellow ping pong ball.
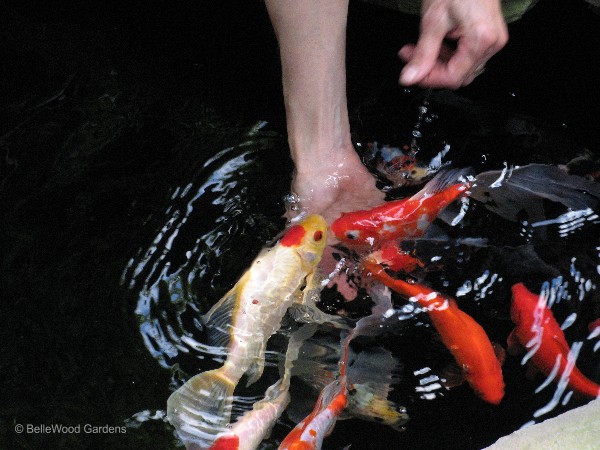
Photograph Credit Paul Glattstein, all rights reserved.
They swim confidently into Carolyn's hand and relax there while
she takes them zooming through the water for a ride.
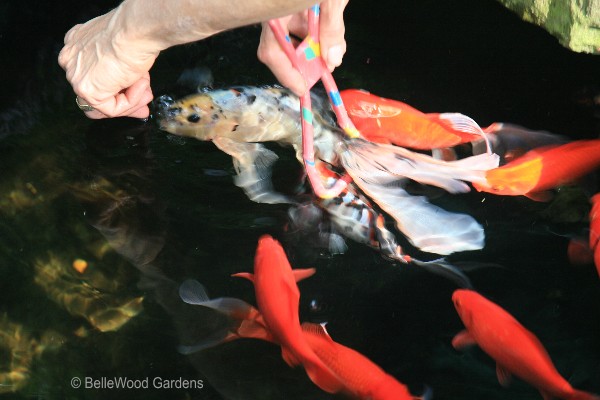
But the best, absolutely deserving of round of applause, has fish
jumping through a hoop. O.K., be persnickety, he's swimming. And it's a dog toy,
not a hoop. Picky, picky. I think it's fantastic. Kudos to Carolyn.
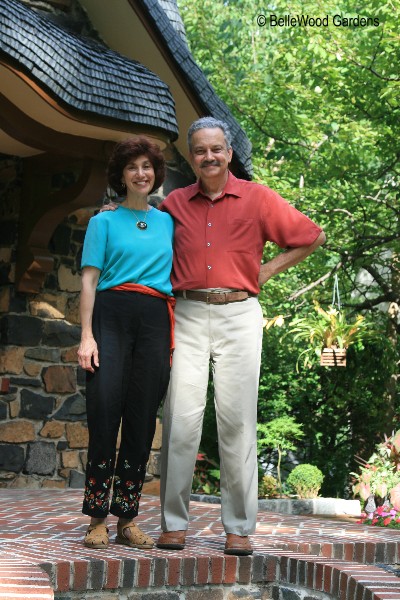
Thank you to two wonderful people for a special afternoon in their company,
at the Mushroom House and its garden.
Thursday, 21 August 2008 Onward, to Buck Gardens We made a brief stop at Bamboo Brook Outdoor Education Center.
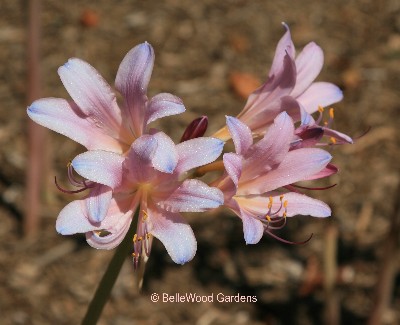
I did prefer the generous sweep of naked ladies, aka surprise lilies
.
We did not stay for long, instead heading off to a restaurant for lunch. Our third stop was at Leonard J. Buck Garden on Layton Road in Far Hills, New Jersey.
Water is very much a feature of the garden, with ample opportunities
The pond is home to schools of bluegills and sunnies, and also a wonderful site
.
Another simple bridge that brings the leisurely strolling visitor across the shade-dappled brook. Now the plants that were of modest size in April have grown tall and stately,
Latest of our native rhododendrons in flower, Rhododendron prunifolium
The long path unrolls across the steep hillside, its meanderings writing on the landscape
Two ornamental pools are undergoing a major renovation project that was begun last year.
If garden archeology fascinates you, peering through plastic site fencing might be of interest.
or rain lilies or magic lilies, Lycoris squamigera, along the driveway. 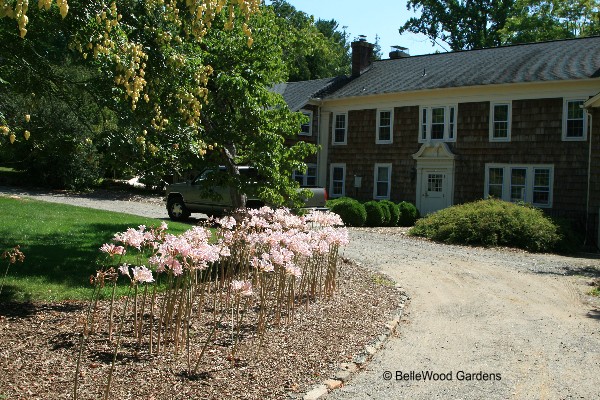
Part of the Somerset County parks department, this charming garden is open 10:00 a.m. to 4:00 p.m. Monday to Friday,
until 5:00 p.m. on Saturdays, and noon to 5:00 p.m. on Sundays. In winter - December, January, February, and March -
Buck Gardens is closed on weekends and major holidays.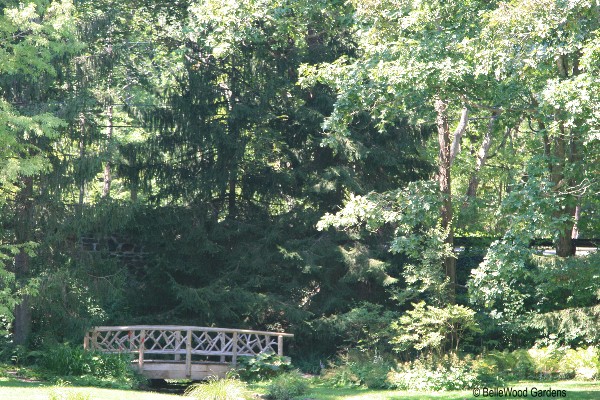
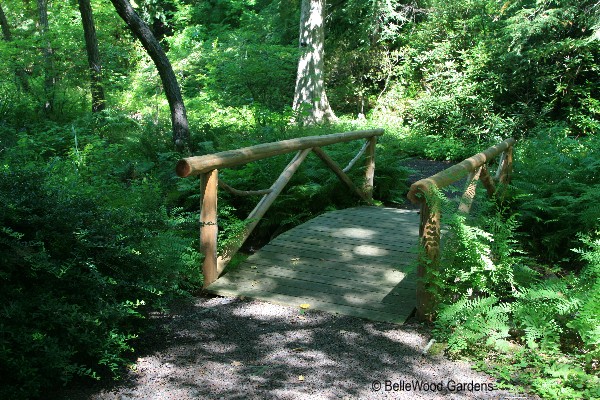
to cross from here to there and back again, for example - this rustic bridge.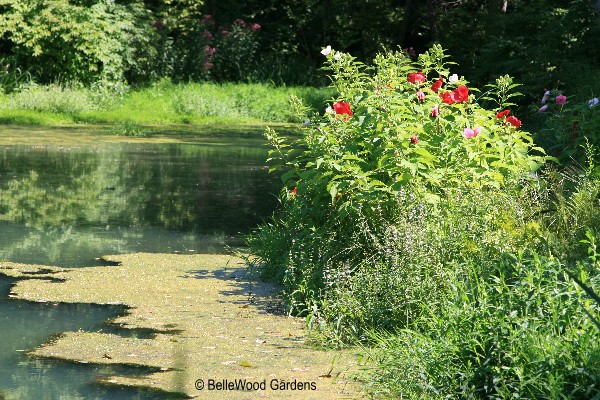
for water cannas and Joe Pye weed and hibiscus, all plants that enjoy growing with wet feet.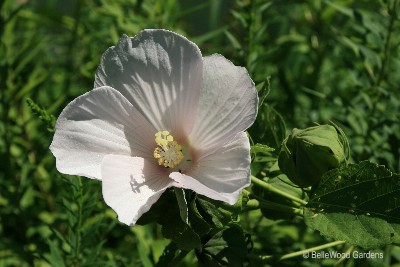
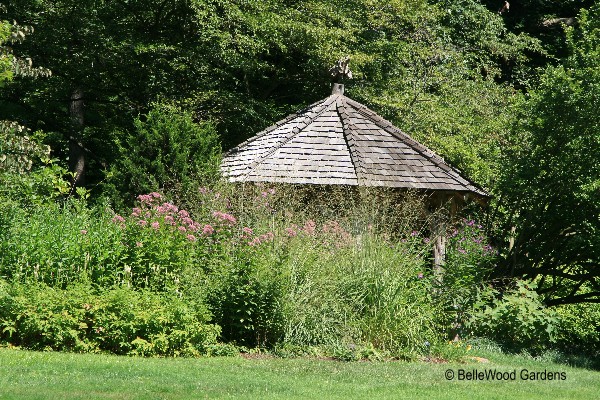
such as these Joe Pye Weed, Eupatorium purpureum, and tall grasses
that almost completely hide the gazebo from view. 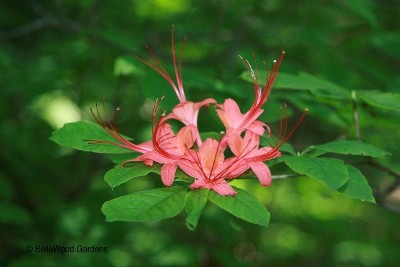
sports its red-orange flowers adorned with long, shrimp-like antennae.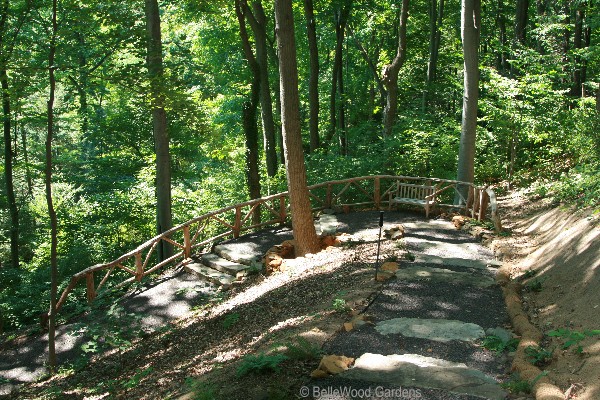
in stone and ferns, a cedar fence rail protecting the edge. It is a very gentle stroll,
most enjoyable for the scenic overlook of shrubs and water glimpsed through
the surrounding trees. Still new and somewhat raw, by spring it will be integrated
into the landscape, raw jute groundcloth disguised by plants (ditto for the rolled fabric
as siltation barrier at the path's boundaries. Up at the top, where a pleasant bench
invites the casual visitor to take a peaceable rest, enjoy pink and white shuttlecock flowers
ofCyclamen hederifoium. Jim used a suggestion I'd made, and overplanted the tubers
with the color-splashed leaves of Ajuga reptans 'Variegata' whose
gray-green and creamy leaves are elegant on their own, and one that further
will make a handsome, complementary groundcover over the cyclamen tubers.
See also April 2008 and scroll down for a spring time visit to Willowwood
on April 10th, and two visits to Leonard J. Buck Gardens, on April 10th and 27th.
Thursday, 21 August 2008 A Visit to Willowwood I got an e-mail from my friend Woody. "Is it time for a jaunt to visit some gardens?" he suggested. So we picked a day and a time and some gardens to visit. The weather cooperated, and - as you will see - we had a very good time.
First stop, we decided, would be the garden furthest away from BelleWood Gardens and from Woody's home. That sent us off to Willowwood Arboretum, part of the Morris County park system located in Chester Township, New Jersey. Henry and Robert Tubbs, two Quaker brothers, avid gardeners and enthusiastic plant collectors bought the property 100 years ago, in 1908. The 130 acres offered them ample space and wonderful opportunities to establish native and exotic trees and plants. Collecting and growing distinctive plants of all kinds became the brothers continuing hobby for half a century, and many specimens date from their initial plantings. In total, there are 3,500 taxa, including historic collections of oak, maple, willow, magnolia, lilac, flowering cherry, fir, pine, and a superb specimen of Dawn Redwood, Metasequoia glyptostroboides, now more than 98 feet tall.
The lacy wrought iron fence and gate lead to the Cottage Garden,
While I enjoy them, these two charming formal gardens are not the reason
A long-term friendship with Dr. Benjamin Blackburn, professor of botany at Drew University,
This little humpback stone bridge crosses the small stream. A tall and stately pagoda lantern intermingles with tree branches
Walled in stone. Quiet water. Still. A mirror to the canopy of leaves above.
A stone urn with a spattering of lichens and some moss. .
And near the cedar shingled barn a few dahlias, their sunny golden flowers
Saturday, 16 August 2008 Hypertufa, Part II Wood can be shaped with cutting tools, but it is rigid. Glass is plastic when heated, rigid when cooled. Clay is malleable when wet, rigid after firing in a kiln. Concrete is plastic, in the sense of suitable for shaping while first mixed. Afterward it dries, it is rigid. So a hypertufa trough, cast in a couple of cardboard boxes or a plastic dishpan as molds, is one easy option. However there's far more in the way of options. For example; Joan and I cast some leaves
More of an intaglio effect, actually. Spray leaf with cheap cooking spray
What I did here was quite simple. Spray leaf with cooking oil spray.
There's a plastic pan upside down under the mound of damp sand. I've placed three rhubarb leaves, surface side down, over the sand and
After firmly packing hypertufa mix over the leaves it is covered with
And here's the finished result. Not bad if I say so myself.
Wednesday, 13 August 2008 Hypertufa, Part I Ages ago, British alpine gardeners used stone watering troughs bought off the farm as planters. Very elegant, very heavy. Then as supplies were bought up the troughs became expensive. Very. Expensive. Farmers switched over to metal or heavy duty plastic stock watering tanks. These wouldn't do for alpine gardeners. Someone came up with the bright idea of making planters out of concrete. Cost dropped, weight did not. Then a clever do-it-yourself individual invented hypertufa. An amalgam of cement, peat moss, and perlite, the result is a weather-proof, stone-like, light weight planter. The shape? as plastic as your gardener's heart desires since concrete - before it sets, that is! - will accept any shape a form provides.
"It's easy." I assured Joan. "We can do this. It's fun. Like making mudpies." So we did it. Here's our first attempt. There are as many recipes for hypertufa as there are for making brownies.
The sphagnum peat moss needs to be sifted. Very easy to do.
No, we're not sprinkling chicken feathers over the hypertufa ingredients
Forming a hypertufa planter is almost laughably easy. As easy-peasy
Pack a layer of hypertufa into the bottom of the larger box.
Center the smaller box inside the larger one. I taped the flaps
Now pack (and I mean pack) hypertufa mix into the space
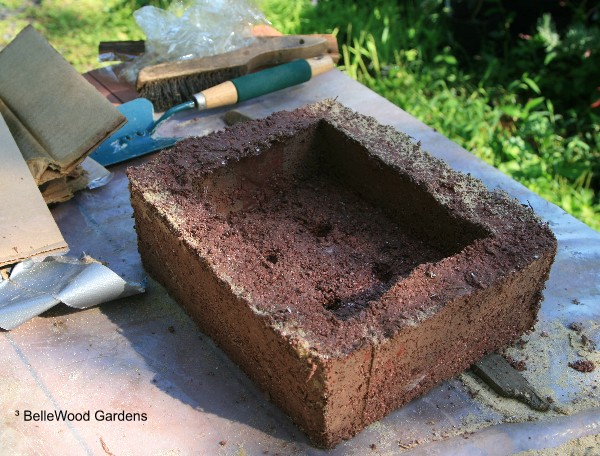
And then comes the exciting part - uncovering your creation.
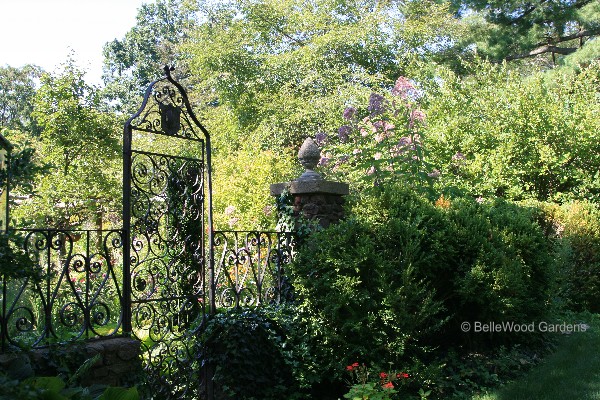
one of two small formal gardens at Willowwood, and located in front of the house
which dates back to 1792. The other is Pan's Garden, a narrow formal garden
meant to be viewed from a covered porch at the back of the house.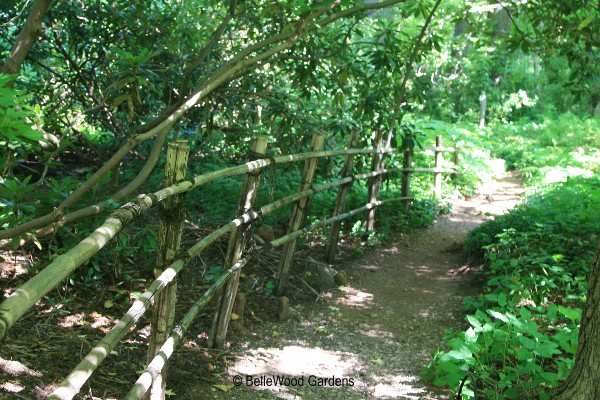
that I visit Willowwood. Rather, it is the informal woodland paths that sometime meander
alongside a little creek, a narrow, streamside trail reminiscent of a Japanese painting,
gentle now in summer but apt to flood with spring rain and snowmelt.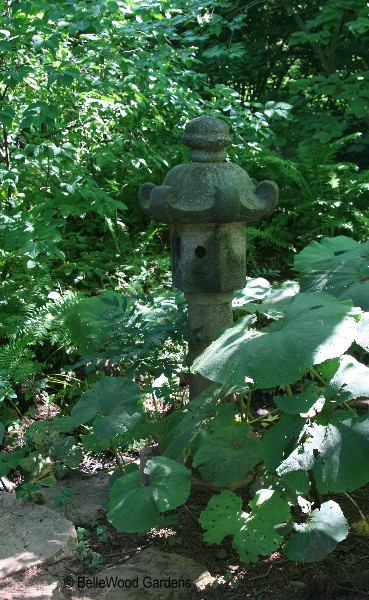
further allowed the collection at Willowwood to grow. One garden designed by Dr. Blackburn
made use of many of the Chinese plant introductions from famed plant explorer E. H. Wilson
with a garden of distinctly Japanese design.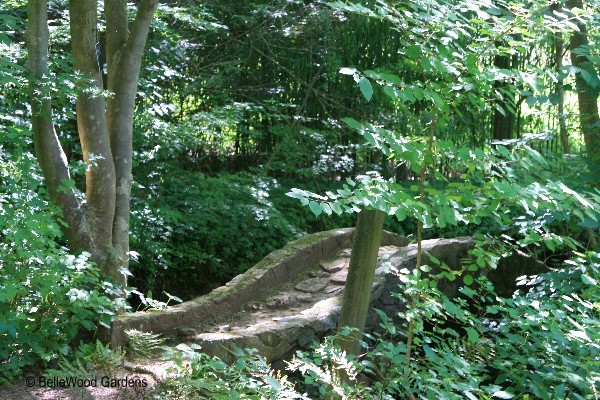

on a path leading back to the house. Envision it when the little maple turns
to autumn crimson, or snow lays along the many layers of its roofs.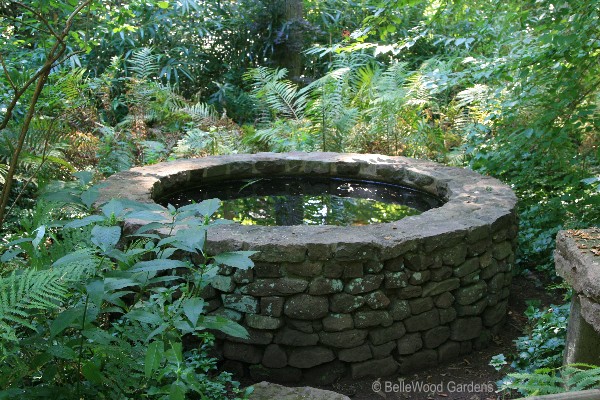
Time out to sit and contemplate the garden beauty created decades past.
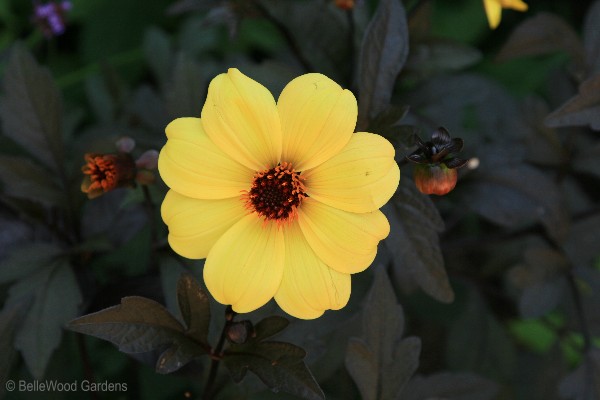
glowing against the dark foliage. More cultivated than the woodland paths we just trod,
beauty appropriately situated near a building that confirms its reliance on a cultivating hand.

from a dollar store. It functions as mold release, keeping concrete from locking on
to the leaf after casting. No big deal if you don't spray -
leave the casting outdoors and the leaf will rot away over time.
Then pounce (fancy way of saying "dust) dry concrete tinting powder
over the oil-sprayed leaf, in this instance, a hosta. Place leaf dusted side up
in bottom of casting form. Pack in hypertufa mix and
allow project to mature for a couple of days.
For comparison, there is an unsprayed leaf at the left of this image.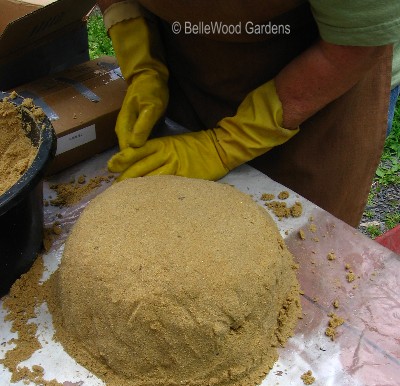
Photograph Credit Joan Carter, all rights reserved.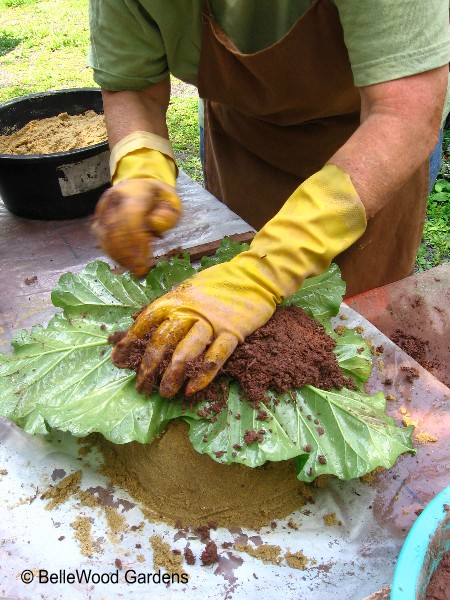
Photograph Credit Joan Carter, all rights reserved.
now starting to pack hypertufa mix over them to make a leaf-embossed bowl.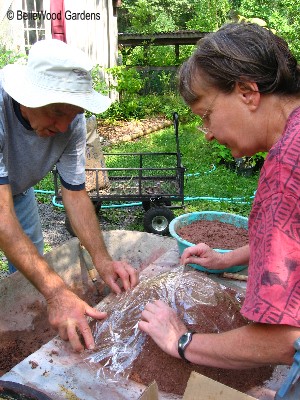
plastic wrap so the mix does not dry out too rapidly. Slow curing = stronger results.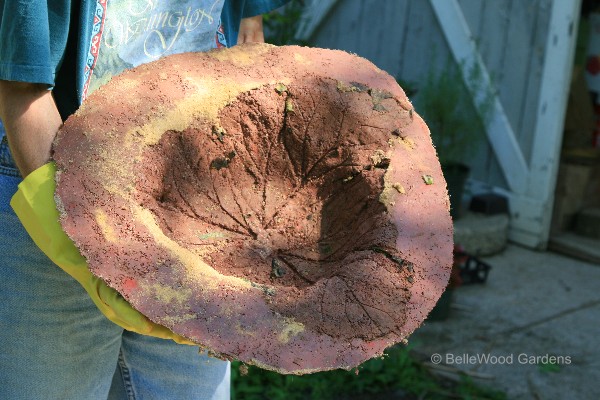
Hosta leaves are the best though. Rhubarb leaves are fair. Fig leaves, surprisingly,
were poor. Teacup elephant ear were also only fair.
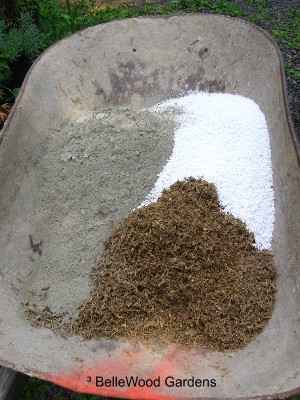
My favorite basic recipe is 2 parts by volume of cement, 2 parts perlite, and
3 parts sphagnum peat moss. That's the long stringy stuff, not the brown kind
you'd use in the garden or add to a potting mix. Some folks don't use it
due to environmental / sustainability concerns. However I don't
know of any substitutes for making hypertufa. Coir fiber is not the same.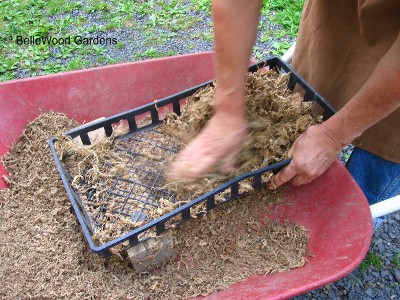
Photograph Credit Joan Carter, all rights reserved.
Use a plastic pot tray, the kind with a diamond patterned bottom. Then
just scrunch a handful of the sphagnum back and forth over the tray. 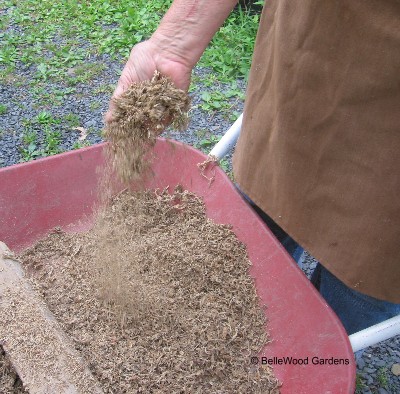
Photograph Credit Joan Carter, all rights reserved.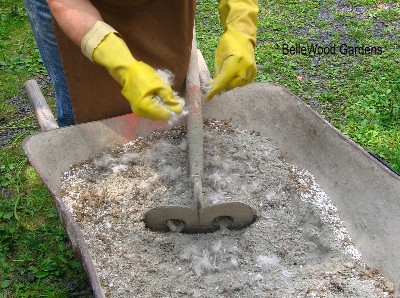
Photograph Credit Joan Carter, all rights reserved.
in some sort of ritual. Fibermesh is a reinforcing material, much easier to use
than the chicken wire that used to be used way back when I first made troughs.
Important! With all the shredding of sphagnum, dusty perlite and cement,
and the fibermesh be sure to wear a dust mask while mixing these ingredients.
After water is added to the dry ingredients you can remove your dust mask.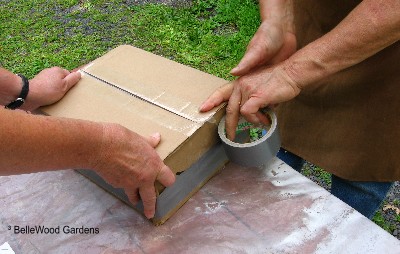
Photograph Credit Joan Carter, all rights reserved.
as a couple of cardboard boxes. Tape the outside of the larger box
with duct tape so it won't slump as it gets damp.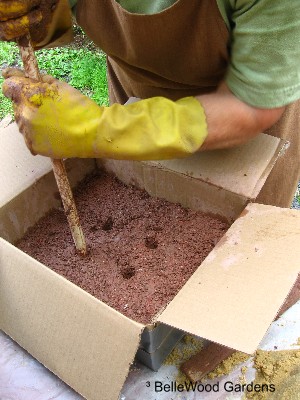
Photograph Credit Joan Carter, all rights reserved.
Wear sturdy plastic gloves while handling wet hypertufa mix.
Note: our hypertufa looks red because we tinted it with
powdered concrete pigment. Make some drainage holes at this time.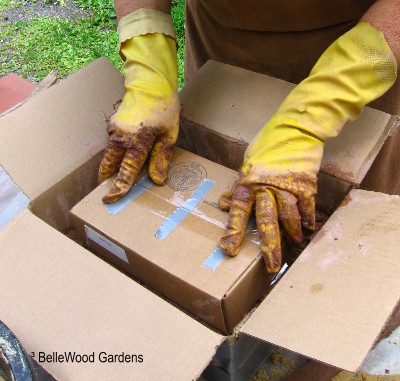
Photograph Credit Joan Carter, all rights reserved.
down so they wouldn't get in my way at the next step.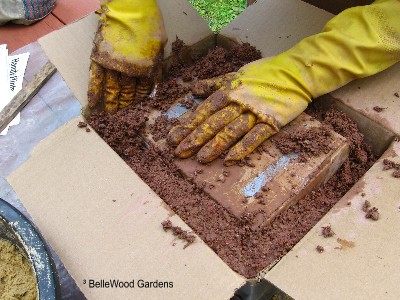
Photograph Credit Joan Carter, all rights reserved.
between the two boxes. You don't want voids or air spaces
that would weaken the finished planter. Cover any exposed
hypertufa with plastic wrap so it will dry more slowly. Rinse
whatever you mixed the hypertufa in, any tools, your gloves.
Now comes the hard part. Leave the hypertufa trough alone
for 36 to 48 hours. Moving it too soon, before
the hypertufa is set up, will cause damage.
Slow cure makes stronger concrete / hypertufa.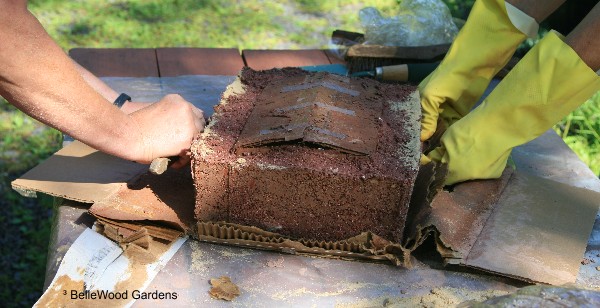
Photograph Credit Joan Carter, all rights reserved.
Hypertufa is like potato chips in that one is not enough.
You're going to want to make more. Why not! Go for it.